Check out these DIY bookmarks that you can create with and for your little swimmer. These can make a good stocking stuffer for your little reader. A Kindle or iPad is not the same as the smell of a good old paper book! Scroll on to find a marker for your next page-turner!
BONUS! We’ve also included grown-up bookmarks for parents and friends, which can make good stocking stuffers with a personal touch.
Animal Themed Bookmarks
DIY Bookmark 1: Shark Fin
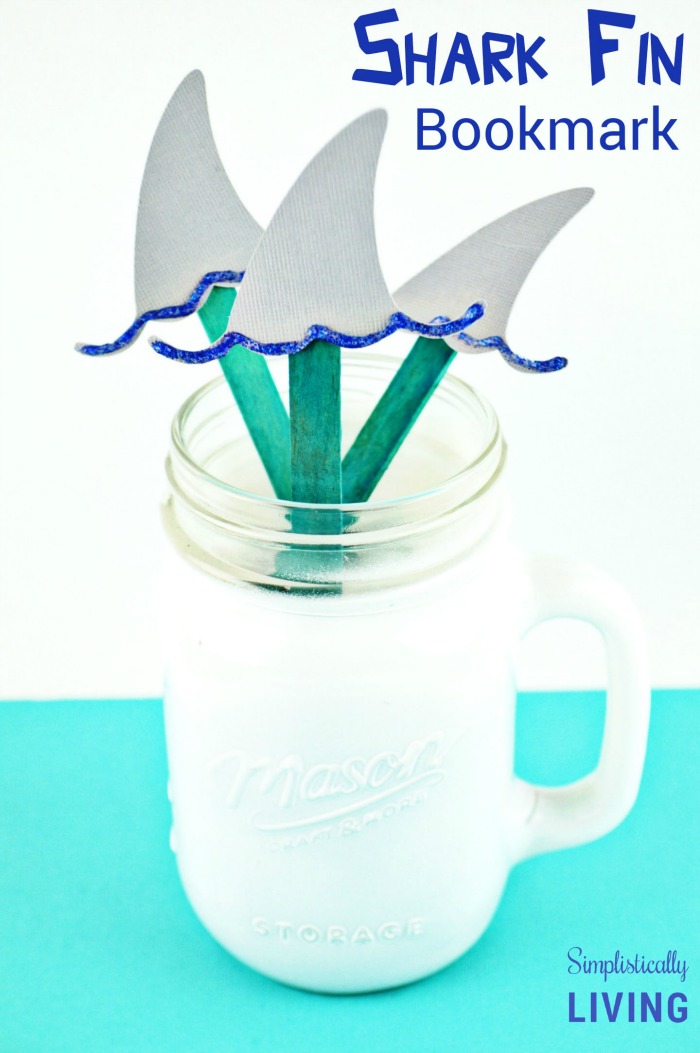
Source: Simplistically Living
This shark fin is good for reading and playing alike!
You will need:
- Grey cardstock
- Blue craft stick
- Blue glitter glue
- Glue
- Scissors
- Shark fin shape
Directions:
- Draw a shark fin shape on your cardstock and then cut it out.
- Use the blue glitter glue to make a wavy line which can be cut out after it dries.
- Glue the fin onto a craft stick and let it all dry.
- Get reading!
Instead of buying craft sticks, you can use left-over Popsicle sticks and paint them whatever colour you want!
DIY Bookmark 2: Shark Corner
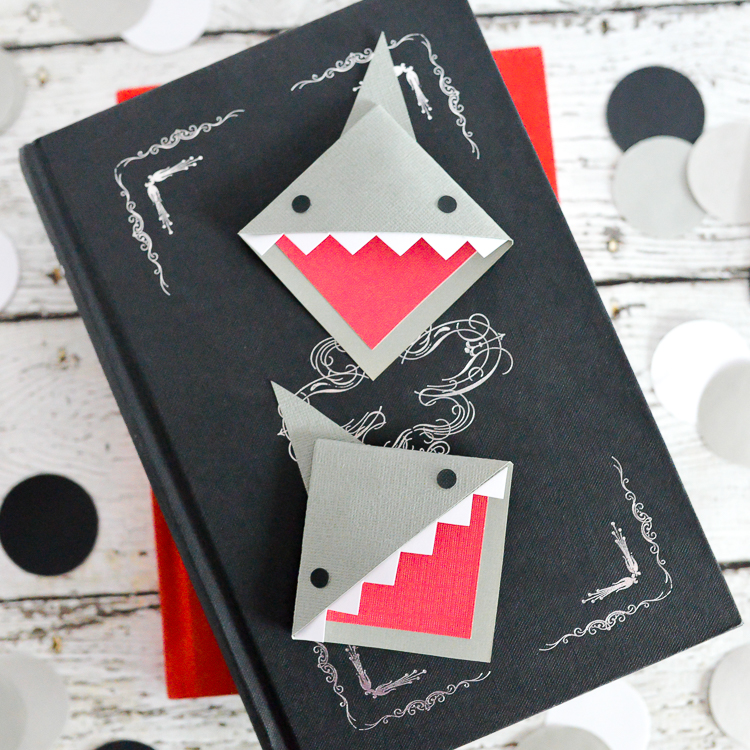
These will take a bite out of your next read!
You will need:
- Red, white, black and grey paper or whichever colour you want your shark to be
- Craft glue
- Scissors
Directions:
- Cut all the pieces you need, red for the mouth, white for the teeth, black for the eyes and grey for the shark shape. You can download a PDF with these shapes.
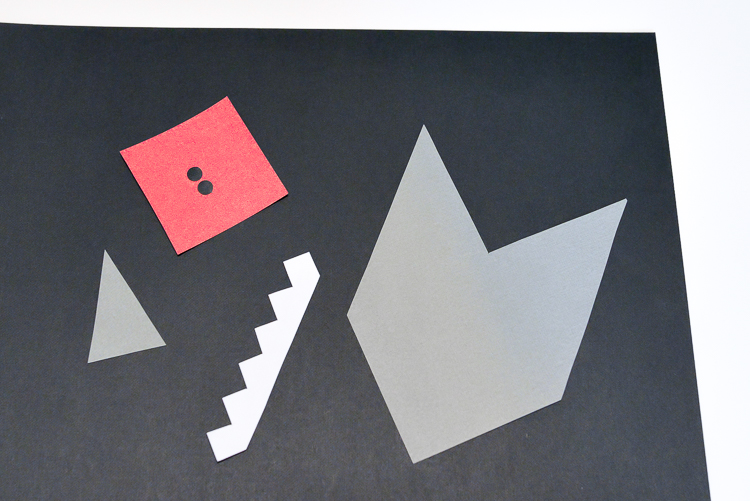
- Diagonally fold down the two triangles of the large grey piece so that you now have a square.
- Glue the red paper onto the base of your square and now glue the back of the second triangle you folded down and the front of the first triangle.
- Last, glue the teeth, the eyes and the fin onto your shark.
You can also use a hole punch for the shark’s eyes.
DIY Bookmark 3: Sea Turtle
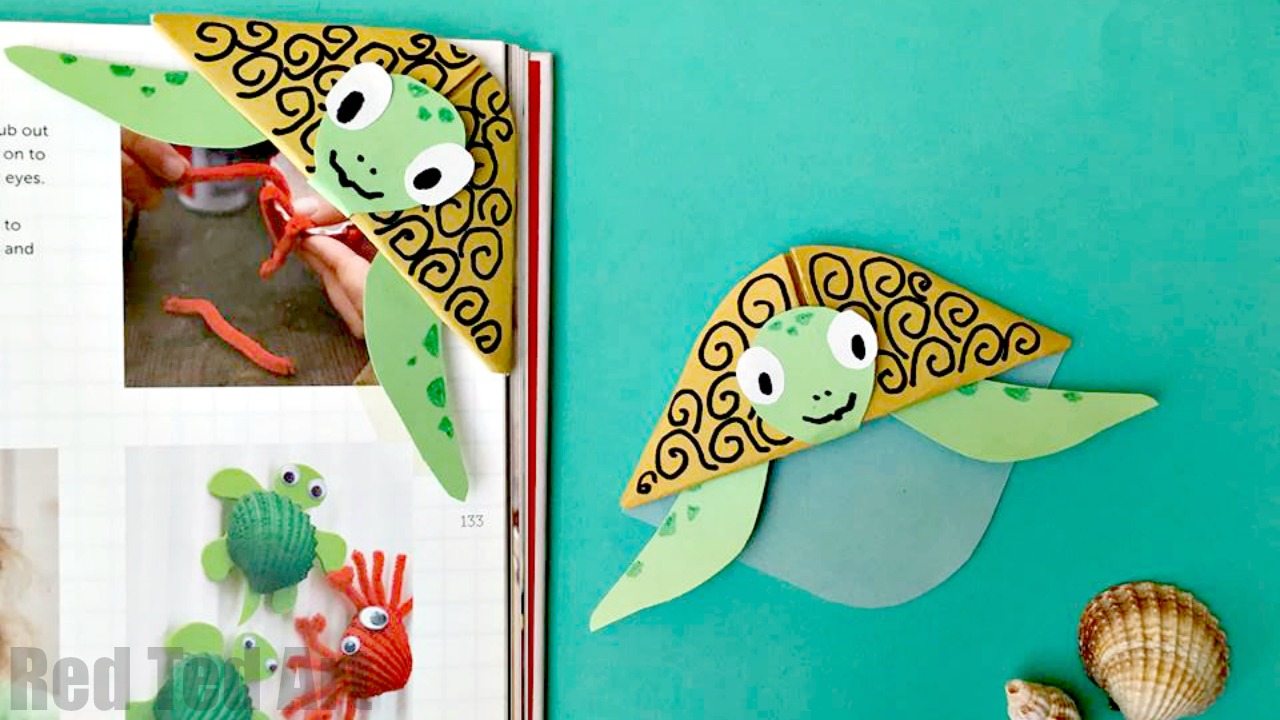
Below is a video about how to make a sea turtle bookmark!
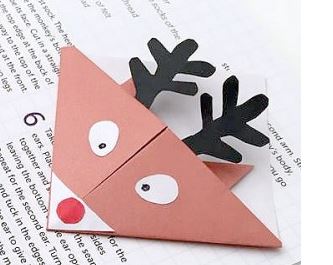
DIY Bookmark 4: Rudolph the Red-Nosed Reindeer
Nobody can resist this red-nosed festive favourite.
You will need:
- Origami paper
- White, red and black paper scraps
- Black pen
- Glue stick
Directions:
This tutorial video shows you how to let your imagination run wild and create any animal you want!
DIY Bookmark 5: Frosty Little Snowman
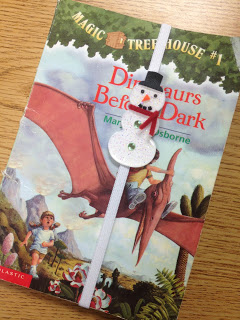
You will need:
- Elastic bands
- 3D stickers
- Hot glue
- Cardstock
Directions:
- Cut the shape of the 3D sticker from the cardstock and put it at the back of the sticker.
- Cut the elastic band to the size you want and then hot glue or tie it.
- Hot glue the sticker to the elastic band, and you have yourself a merry little snowman!
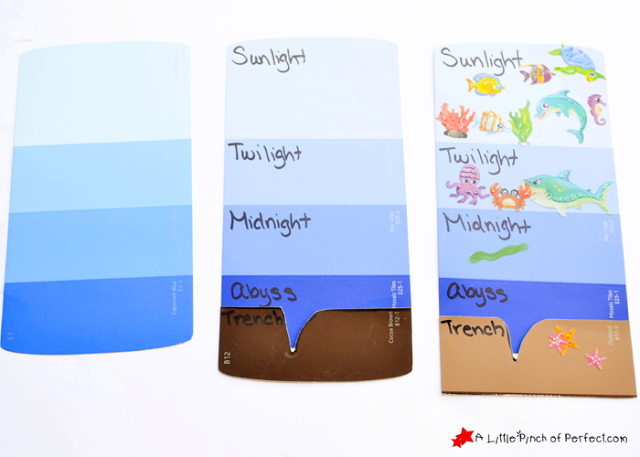
DIY Bookmark 6: Ocean Layers
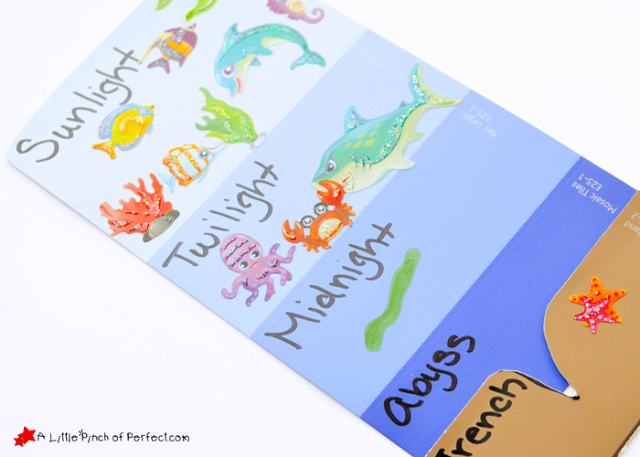
Source: A little pinch of perfect
Learn about the layers of the ocean using this bookmark!
You will need:
- Blue paint sample
- Brown paint sample
- Sea animals stickers (or print and cut out your own!)
- Cardstock
- Marker
- Glue
Directions:
- Cut the one brown layer of the sample to make the trench and glue it to the last layer of the blue sample, but be sure not to cover the last blue layer completely.
- Label the blue and brown layers with a marker as follows: Sunlight, Twilight, Midnight, Abyss, and Trench.
- Use the sea animal stickers or cutouts to show what creatures live where. Follow the guide below to place these sea creatures in their homes.
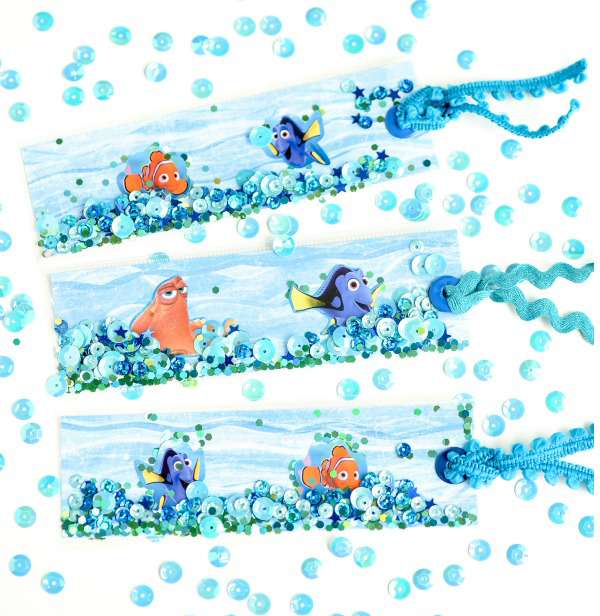
DIY DIY Bookmark 7: Finding Dory
You will need:
- Fuse tool
- Packing tape
- Cardstock
- Glitter
- Sequins
- Finding Dory stickers
- Hole punch
- Ribbon
Directions:
- Cut the cardstock to the size you want the bookmark to be.
- Add Finding Dory stickers to the paper, and add sequins using glue or a hot glue gun.
- Carefully cover the bookmark with a strip of packing tape on the front and back.
- Trim any extra tape down to about a 1/4 inch border.
- Use the hole punch to make a hole in one edge of your bookmark and pass through a piece of ribbon!
If it’s not taped smoothie, little ripples will look like waves!
DIY Bookmarks for Parents
DIY Bookmark 8: Recycled Patterns
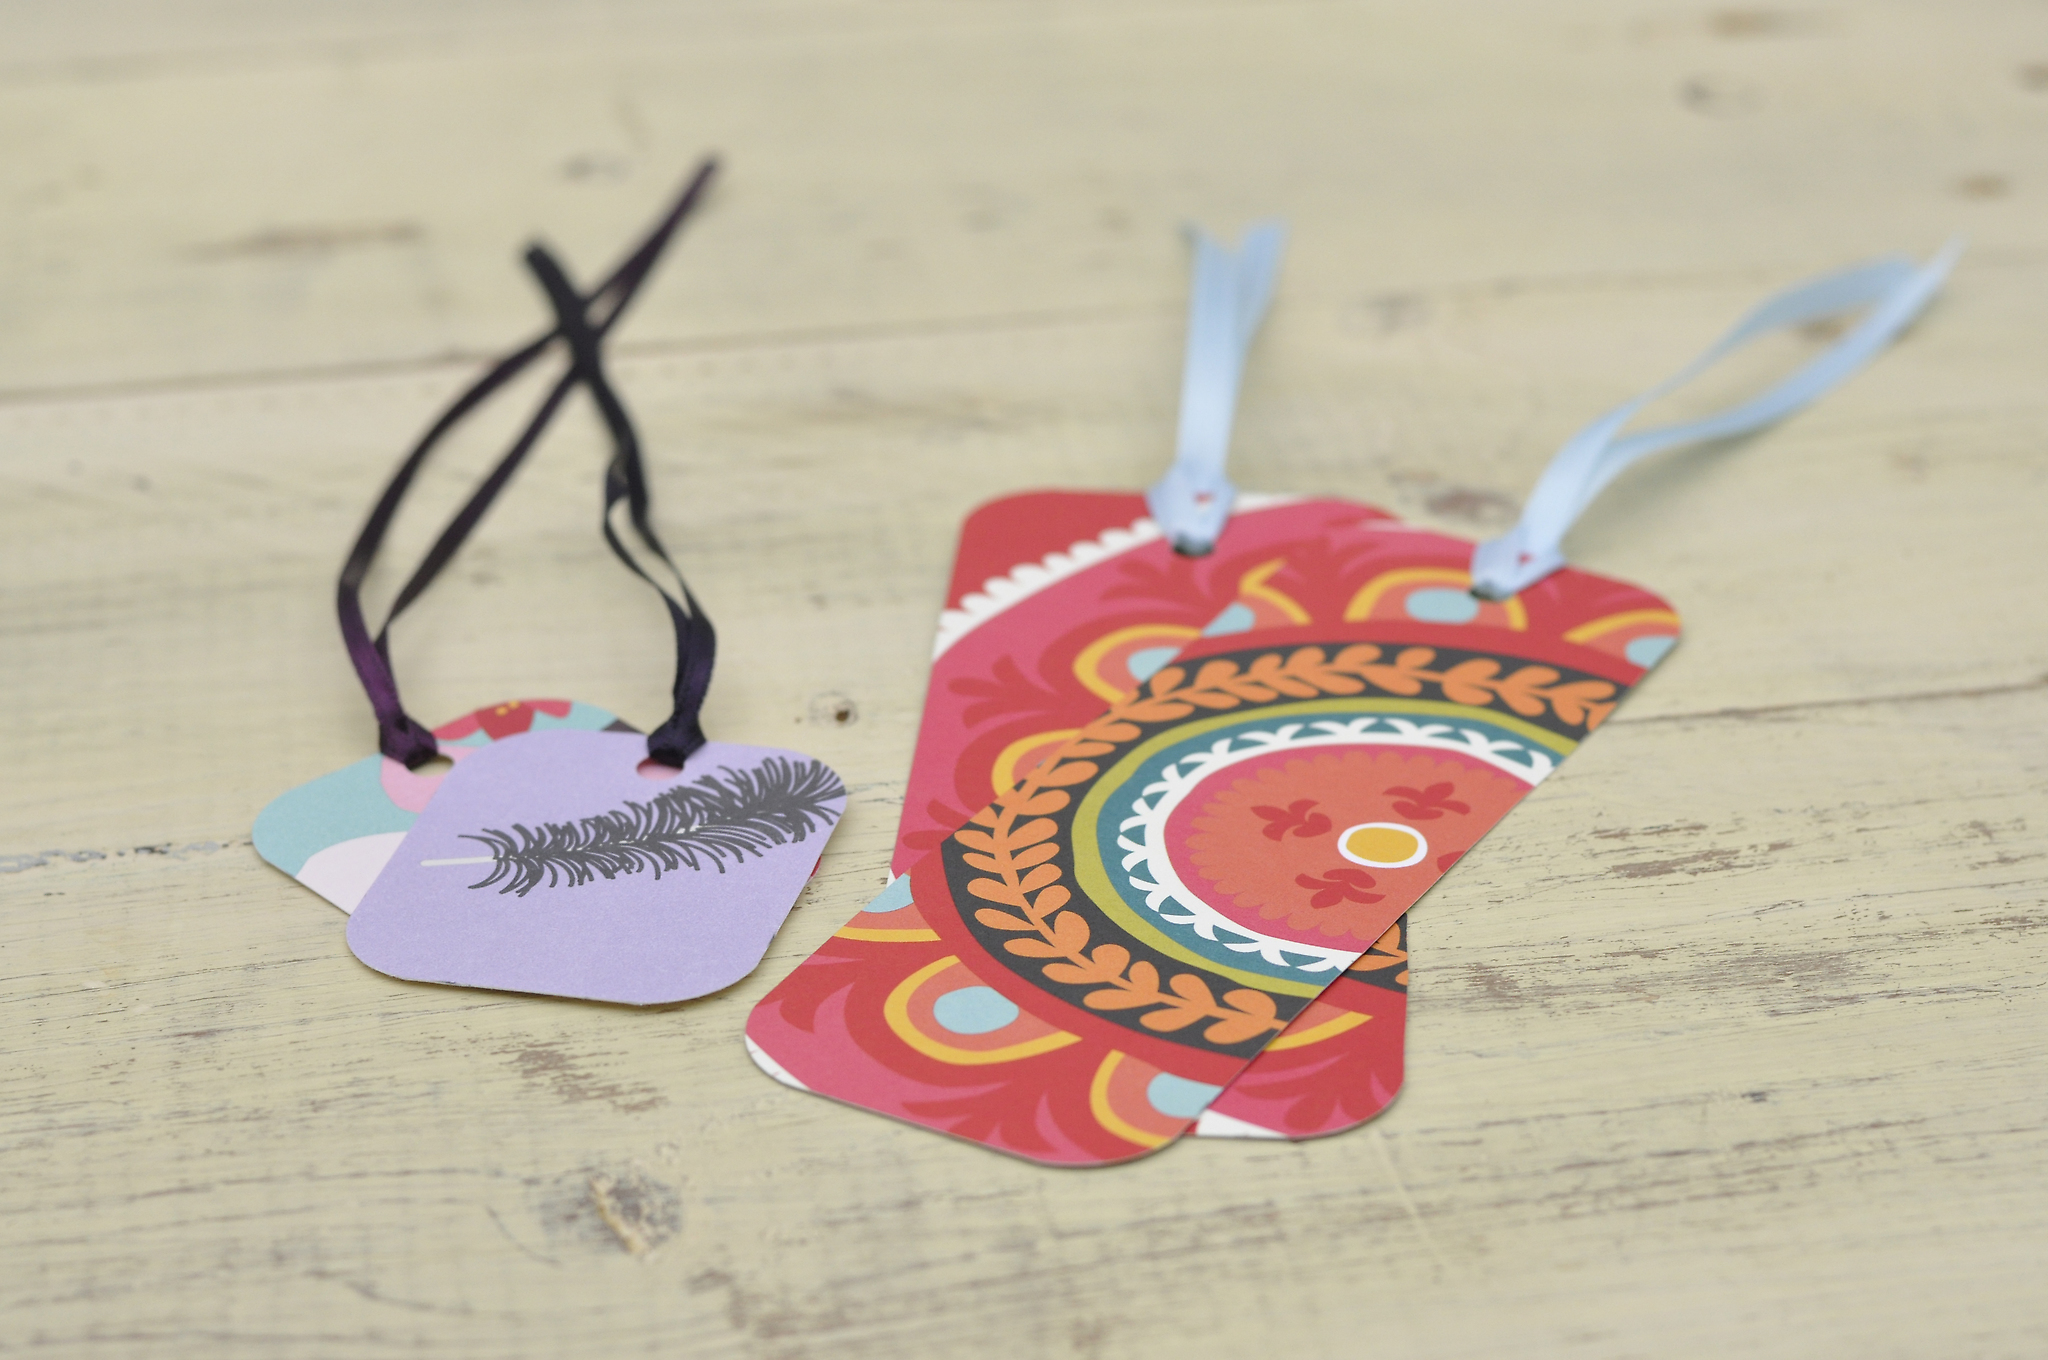
As 2016 comes to an end, reuse your old calendar and wrapping paper scraps to create a bunch of colourful page markers!
You will need:
- Calendar or wrapping paper
- Ribbon
- Scissors
- Hole punch
Directions:
- Cut your favourite section of your calendar in any shape (no need to stick with only squares or rectangles!), or glue your wrapping paper of choice to some cardstock (or a used calendar cover) and cut that out.
- Use scissors to round out any sharp corners so that you don’t get poked in the hand while reading.
- Use the hole punch to make a hole on one edge of the bookmark.
- Thread a piece of ribbon through the hole and you have yourself a custom bookmark!
DIY Bookmark 9: Your Own Kids!
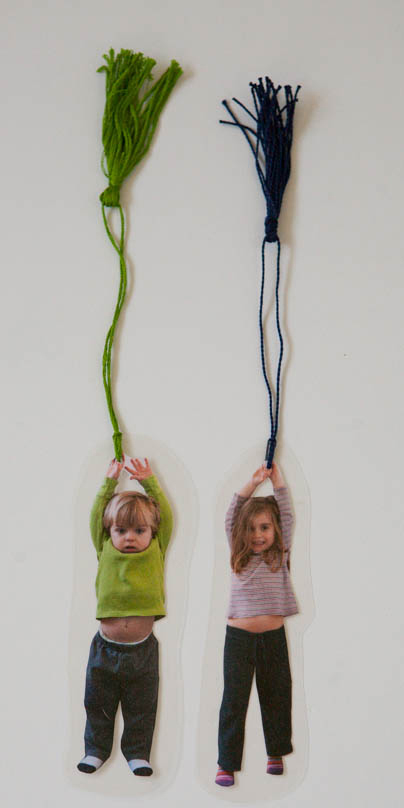
Source: Nearly Crafty
Have a “photoshoot” with your kids. Make sure they have their hands in the air!
You will need:
- Photo of your kid with their arms up
- Laminator or packing tape
- Scissors
- Hole punch
- Cardstock
- Ribbon
Directions:
- Cut out the printed photo of your kid, and glue it onto some card stock.
- Laminate it, or fake it by carefully placing a strip of packing tape over the front and back.
- Cut out your laminated photo, leaving around a 1/4 inch around the edges plus an extra half-inch at the top where their hands are.
- Use the hole punch to make a hole close to the top and then pass the ribbon through it.
DIY Bookmark 10: Fun Photo-Booth
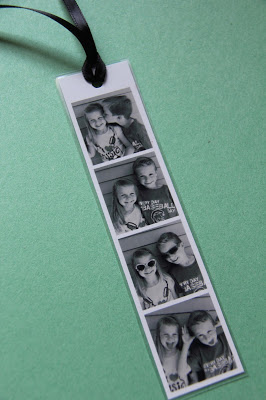
This next bookmark includes the whole family!
You will need:
- Photos of your kids (Tip: black and white looks best!)
- Scissors
- Ribbon
- Laminator or packing tape
- Hole punch
Directions:
- Take cute pictures of your family members and resize them to be small and all the same size (about 2 inches x 2 inches) and print them out.
- Paste them onto cardstock in a strip
- Cut out the strip and laminate them or carefully cover them with a strip of packing tape on the front and back.
- Cut out the laminated strip of photos, leaving a 1/4 inch border around the edges.
- Use the hole punch to make a hole and thread a ribbon through the hole, and there you have it!
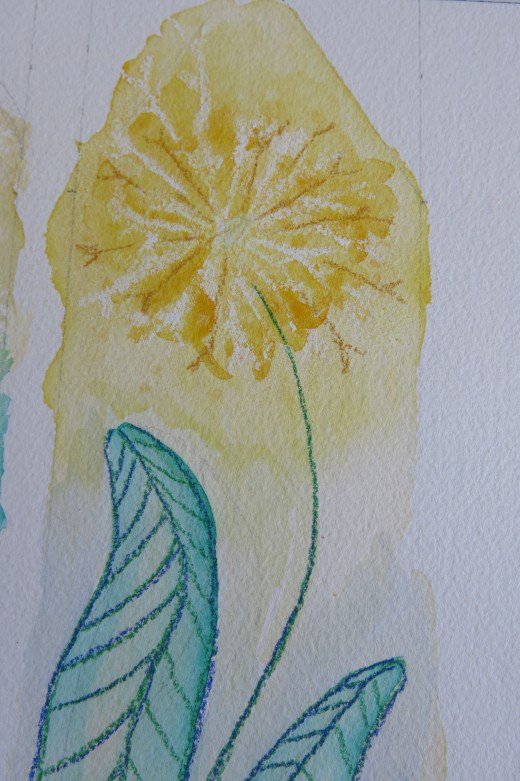
DIY Bookmark 11: Watercolors
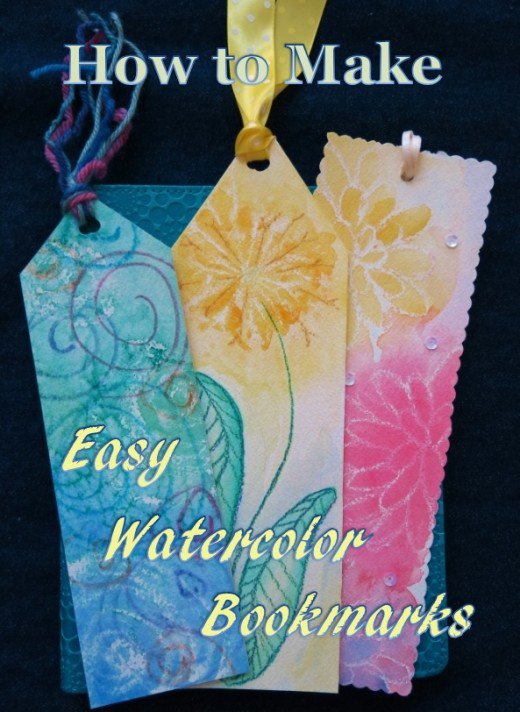
You will need:
- Ruler
- Ribbon
- Pencil
- Watercolor paper
- Watercolor paints and a brush
- Dish for mixing water
- Paper towels to clean your brush
- Hole punch
- Crayons
Directions:
- Take a ruler and a pencil and draw out whatever shape of the bookmark you want.
- Draw pictures with the white crayon to create the pattern you want.
- Mix your favourite paint colour with water and paint over your drawing. Remember the more water you put, the lighter will it be on your bookmark. Once the paint is completely dry, you can even add some other details with your crayons.
- Make a hole at the top of your bookmark and add a ribbon to finish it off!